Eyebrows are genuinely the frame of your whole face — get them right, and everything else falls into place, even if the rest of your makeup is minimal.
The problem most people encounter is trying to follow trends or copy someone else's shape rather than working with their natural brows. That's where it goes wrong.
Map Your Brows Before Anything Else
There’s a simple technique that takes about 30 seconds and prevents a lot of mistakes: the nostril alignment method. Hold a makeup brush or pencil vertically along the side of your nostril — where it meets your brow is where the brow should start. Angle it across your pupil to locate the arch, then tilt it toward the outer corner of your eye to find the tail. Lightly mark these three points before proceeding. This creates a roadmap specific to your face, not someone else's.
Grooming Comes Before Filling
Before reaching for any pencil or powder, tidy up the shape first. Brush all your brow hairs upward with a spoolie to see what's actually there. Trim any hairs that extend beyond your natural brow line using small scissors — just the tips, not more. Then tweeze stray hairs from below the brow, following the direction of hair growth, one hair at a time. Always step back from the mirror frequently to check your progress. The most common mistake? Over-plucking because you got too close.
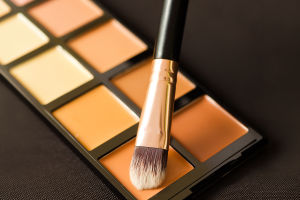
Choosing Your Fill Product
For beginners, a brow pencil is the most forgiving option — it offers precision and is easy to control. Powders provide a softer, more diffused finish but require a steadier hand. Brow gel (clear or tinted) helps keep hairs in place and adds texture to sparse areas without looking overly made-up. For the best results, use a pencil to define the shape and powder to fill and soften afterward.
Color matching is more important than many realize. As a rule, go one to two shades lighter than your hair if you have dark hair, or one shade darker if you are blonde. When in doubt, a neutral brown tone is always a safe choice.
Filling Technique That Looks Natural
Begin from the middle of the brow and work outward using short upward strokes that mimic natural hair growth. Fill in the front section last and with a lighter hand — this area should always be the softest and most diffused. Avoid drawing a solid line across your brow, as it never looks natural even when blended. Build color gradually rather than applying it heavily from the start.
Finish and Set
After filling, brush through your brows with a clean spoolie to blend any harsh lines and set the hairs in place. A small swipe of concealer or light-coverage product under the arch sharpens the outline for a polished finish. Lock everything in with a clear brow gel, which holds the shape all day without appearing stiff.
Final Tips
Brows don't have to be perfect; in fact, slightly imperfect, natural brows often look the best. Give yourself a few attempts before judging — it genuinely becomes faster and easier each time. Remember, the key to great brows is patience and practice. By following these steps, you’ll create natural, flattering brows that frame your face beautifully.